I still remember the day I dragged three giant terracotta pots onto my tiny balcony, filled them with random soil from a hardware store, shoved some seeds in, watered them like crazy — and then wondered two weeks later why absolutely nothing was growing.
That was me. A total beginner with zero clue, a lot of enthusiasm, and a balcony that looked more like a crime scene than a garden.
If you’re just starting out with apartment gardening, first — I love that for you. It’s genuinely one of the most rewarding hobbies you can pick up in a small space. But I also want to save you from the painful trial and error I went through. Because honestly? Most of the mistakes I made were completely avoidable if someone had just told me upfront.
So here are the 10 mistakes I made (and wish I hadn’t), laid out as plainly as I can.
1. I Picked Plants Based on How They Looked, Not How They Grow
Cherry tomatoes looked gorgeous at the nursery. So did lavender. And that tall ornamental grass. I bought all of them on the same day, brought them home to my east-facing balcony, and arranged them like a Pinterest photo.
Three weeks later: the tomatoes weren’t getting enough sun, the lavender was drowning in humidity, and the grass was taking over everything else.
The lesson? Before you buy anything, research what each plant actually needs — sunlight hours, humidity tolerance, space requirements. An east-facing apartment balcony gets maybe 3–4 hours of direct morning sun. That’s perfect for herbs like mint, chives, and parsley. Not so great for tomatoes or peppers, which want 6–8 hours minimum.
A simple trick I use now: check the plant tag and Google the plant name + “apartment balcony” before buying. Takes two minutes, saves weeks of frustration.
2. I Underestimated How Much Drainage Actually Matters
This one cost me three plants in a single month.
I had these cute ceramic pots with no drainage holes. Filled them up. Watered regularly. Watched my basil, mint, and a succulent slowly go yellow and mushy. Turns out, roots sitting in standing water rot pretty fast — and it happens way before you notice anything on the surface.
Now I only buy pots with drainage holes, or I drill them myself (yes, you can drill through ceramic with a tile drill bit — YouTube has great tutorials). I also put a thin layer of perlite or small pebbles at the bottom to help water move through faster.
If you’re using decorative pots without holes, use them as cachepots — put your actual plant in a plain nursery pot with holes inside the decorative one. Best of both worlds.
3. I Watered on a Schedule Instead of Checking the Soil
“Water every two days.” That advice sounded logical. So I set a reminder on my phone and watered like clockwork — whether the plant needed it or not.
Big mistake.
Plants don’t care about your calendar. They care about their soil moisture. In summer, a pot can dry out in a single day. In winter, the same pot might stay moist for four or five days. Watering on a fixed schedule means you’re either overwatering (root rot territory) or underwatering (crispy leaves territory).
The fix is embarrassingly simple: stick your finger an inch into the soil before watering. If it feels damp, skip it. If it’s dry, water it. That’s literally all there is to it.
For anyone who travels or has a genuinely busy schedule, I’d also recommend self-watering pots or a basic drip irrigation kit. I’ve used the Blumat Classic stakes and they work surprisingly well for balcony pots.
4. I Used Regular Garden Soil in My Containers
Sounds obvious in hindsight, but I genuinely didn’t know there was a difference between garden soil and potting mix when I started out.
Garden soil (the kind meant for in-ground beds) compacts when you put it in a container. It gets dense, heavy, doesn’t drain well, and basically suffocates your plant’s roots over time. Potting mix, on the other hand, is specifically designed to be light, airy, and well-draining in pots.
I lost a couple of plants to this before someone at a garden center finally explained it to me.
What I use now: a good quality potting mix as the base, mixed with about 20–30% perlite for better drainage and aeration. If I’m growing herbs specifically, I add a little extra perlite because most herbs hate having wet feet.
Check out 6 Powerful Apartment Garden Guide Soil Tips for Better Growth for a much deeper breakdown on getting your soil mix right.
5. I Skipped Fertilizing Completely (For Months)
I thought soil alone would keep my plants fed. After all, that’s how plants grow in nature, right?
Here’s the thing though — in nature, plants have access to a whole ecosystem of nutrients, decomposing organic matter, worms, microbes. In a pot on your balcony? They’ve got whatever nutrients came in that bag of potting mix, and those run out faster than you’d think — usually within 4–6 weeks.
After that, if you’re not adding anything back, your plants are basically running on empty.
I noticed it when my spinach started growing super slowly and the leaves looked pale. A few doses of a balanced liquid fertilizer (I use a diluted fish emulsion every two weeks) and they bounced back within a couple of weeks.
Here’s a quick fertilizing reference that helped me sort things out:
| Plant Type | Fertilizer Type | Frequency |
|---|---|---|
| Leafy greens (spinach, lettuce) | High nitrogen | Every 2 weeks |
| Fruiting plants (tomatoes, peppers) | Balanced or high potassium | Every 1–2 weeks |
| Herbs (basil, mint, parsley) | Diluted balanced liquid | Every 3–4 weeks |
| Succulents & cacti | Low nitrogen, minimal | Once a month (growing season) |
| Flowering plants | High phosphorus | Every 2 weeks |
Start slow — under-fertilizing is better than burning your plants with too much.
6. I Ignored Sunlight Completely When Setting Up My Space
I arranged my balcony garden based on aesthetics. Taller plants in the back, shorter ones in the front, colors distributed evenly. Looked great in photos.
But I hadn’t tracked where the sun actually hit throughout the day. Some pots were permanently in the shadow of the wall above. Others got brutal afternoon sun that scorched their leaves.
Now before I place anything, I spend one day just observing. I check the balcony at 8am, 12pm, 3pm, and 6pm and note where the sun is hitting and for how long. It takes one day and saves months of guessing.
There are also apps like Sun Seeker or Shadowmap that let you visualize sun movement on your space using augmented reality. Genuinely useful — especially if you’re planning before you even move in somewhere.
7. I Crammed Too Many Plants Into Too Little Space
More plants = more happiness, right? That’s what I thought when I filled every inch of my balcony with pots.
The problem: plants need airflow. When they’re packed too tightly, air can’t circulate properly, humidity builds up between leaves, and that’s exactly the environment that fungal diseases and pests love.
I had a serious aphid problem one summer that I’m pretty sure was made worse by how crowded everything was. I also had powdery mildew show up on my squash almost overnight.
The spacing rules on seed packets and plant tags exist for a reason. I know it looks sparse when you first set things up, but give them room. Your plants will be healthier, bigger, and you’ll deal with way fewer pest problems.
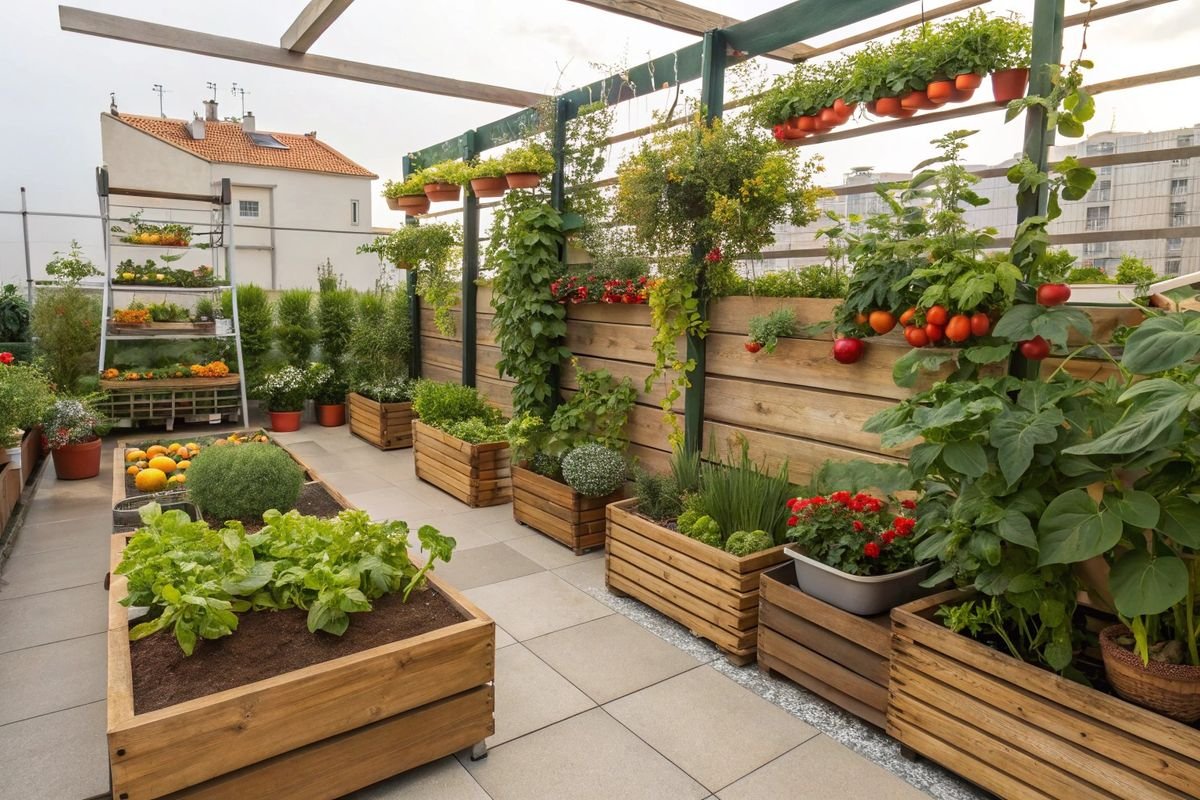
If you’re working with a genuinely tiny balcony, go vertical instead of spreading out horizontally. Wall-mounted planters, tiered shelving units, hanging baskets — these let you grow more without crowding at ground level. Here are some great 9 Smart Apartment Garden Guide Tricks for Tiny Balconies that actually helped me rethink my layout.
8. I Never Hardened Off My Seedlings Before Moving Them Outside
This mistake killed an entire tray of tomato seedlings I’d grown from seed indoors. I was so proud of them. They were lush, green, thriving under my grow light.
Then I moved them to the balcony on a warm day, and within 48 hours they were wilted, sunburned, and half of them didn’t recover.
What I didn’t know: plants grown indoors are basically used to a sheltered, consistent environment. Direct outdoor sun, wind, and temperature fluctuations are a shock to their system. You have to harden them off — gradually introduce them to outdoor conditions over 7–10 days.
Basic hardening off schedule:
- Days 1–2: Put seedlings outside in a shaded spot for 1–2 hours. Bring inside.
- Days 3–4: Increase to 3–4 hours, still mostly shaded.
- Days 5–6: Move to partial sun for 4–5 hours.
- Days 7–8: Give them 5–6 hours of morning sun.
- Days 9–10: Leave them out most of the day, including some afternoon sun.
- Day 11+: They’re ready to stay outside permanently.
Painfully simple, but I had no idea it was even a thing when I started.
9. I Didn’t Keep Any Records of What I Was Doing
After a few months of gardening, I genuinely couldn’t remember what I’d planted where, when I’d last fertilized, which plants had done well and which had flopped, or what soil mix I’d used in which pots.
Everything was just floating in my head — and my head is not that reliable.
Now I keep a basic garden journal. Nothing fancy — just a notes app on my phone (I use Notion but even the default Notes app works). I jot down:
- Plant name and where I bought it
- Date planted
- Soil mix used
- Last watered / last fertilized
- Any problems I noticed
- What worked, what didn’t
At the end of each season, I look back and it’s incredibly useful. I can see patterns — which plants thrived in which spots, whether I tend to overwater in certain months, which varieties gave me the best harvests.
Takes about 2 minutes per week and has made me a genuinely better gardener.
10. I Gave Up Too Fast When Things Went Wrong
The first time a plant died on me, I took it personally. Clearly I had no idea what I was doing, clearly I wasn’t cut out for this, clearly apartment gardening just wasn’t for me.
I almost quit.
But here’s what I’ve learned after a couple of years of doing this: plants die. Even experienced gardeners lose plants. Sometimes it’s your fault, sometimes it’s not. The goal isn’t to keep every plant alive forever — it’s to learn something each time something goes wrong and do better next time.
The basil that drowned? Taught me about drainage. The tomatoes that didn’t fruit? Taught me about sunlight hours. The spinach that bolted? Taught me about temperature and timing.
Every “failure” is just data. And data makes you better.
If you’re feeling stuck or discouraged, go back to basics. Start with just one or two plants that are genuinely hard to kill — pothos, mint, or green onions. Build your confidence, then expand. Check out 7 Essential Apartment Garden Guide Tips for Beginners if you want a solid foundation to start from.
A Quick Summary of All 10 Mistakes
| # | Mistake | The Fix |
|---|---|---|
| 1 | Choosing plants based on looks | Research light & space needs first |
| 2 | Using pots without drainage | Always use pots with holes or drill them |
| 3 | Watering on a fixed schedule | Check soil moisture before watering |
| 4 | Using garden soil in pots | Use quality potting mix + perlite |
| 5 | Not fertilizing at all | Feed every 2–4 weeks with liquid fertilizer |
| 6 | Ignoring sunlight patterns | Track sun movement before placing plants |
| 7 | Overcrowding plants | Give space; go vertical to add more |
| 8 | Skipping the hardening off process | Gradually introduce seedlings to outdoors |
| 9 | Keeping no records | Keep a simple garden journal |
| 10 | Quitting too early | Treat failures as learning, not loss |
Honestly, apartment gardening has brought me a lot of quiet joy — fresh herbs on a Tuesday morning, a tomato I grew myself in a salad, the satisfaction of a balcony that actually feels alive. None of that would’ve happened if I’d quit after my first few disasters.
You don’t need a lot of space, money, or experience to make it work. You just need a little patience, a willingness to learn from your plants, and maybe a nudge to avoid the mistakes I already made for you.
Start small, stay curious, and enjoy the process.
Also worth reading: 10 Smart Apartment Garden Guide Vegetable Picks for Small Spaces — a great next step once you’ve got the basics sorted.