Let me be honest with you — I killed three plants in my first month of apartment gardening. Not because I forgot to water them. Because I over-watered them.
I’d come home after a long day, feel guilty about ignoring my little balcony garden, and just… dump water on everything. A week later, yellow leaves. Root rot. Dead basil. It was a whole thing.
If you’re juggling a full-time job, a social life, and somehow trying to keep a few plants alive in your apartment, you already know the struggle. Watering sounds simple — it’s literally just water — but getting it right when you’re busy is actually one of the trickiest parts of apartment gardening.
So here’s everything I’ve learned (often the hard way) about watering smarter, not harder.
1. Stop Watering on a Schedule — Water When the Soil Tells You To
This was my biggest mistake early on. I had a little sticky note on my fridge: “Water plants every Tuesday and Friday.” Felt responsible. Very adult of me.
The problem? Plants don’t care about your calendar.
A hot, dry week in summer? Your herbs might need water every single day. A cloudy, humid stretch? That same pot might be fine for 4-5 days. Blindly following a fixed schedule is how you end up either drowning your plants or letting them dry out completely.
The finger test is your best friend. Stick your finger about an inch into the soil. If it feels dry at that depth, water. If it still feels damp, leave it alone and check again tomorrow. It takes literally five seconds and it’s more accurate than any schedule.
For most apartment plants — herbs, tomatoes, peppers — you want the top inch to dry out between waterings. For succulents and cacti, let it dry out even deeper (2-3 inches) before you water again.
Once I stopped following a rigid schedule and started actually checking the soil, I stopped losing plants. Sounds obvious in hindsight, but nobody really talks about this when you’re starting out.
2. Self-Watering Pots Are Genuinely Life-Changing
I resisted buying self-watering pots for a long time because I thought they were overpriced gimmicks. I was wrong.
Self-watering containers have a reservoir at the bottom separated from the soil by a barrier. The plant draws up water through capillary action — basically, it drinks what it needs, when it needs it. You just top up the reservoir every few days (or once a week for some plants), and you’re done.
For busy people, this is a game changer.
I use these for my herbs — basil, mint, parsley — because those plants are dramatic and will wilt dramatically if they dry out even slightly. With a self-watering pot, I refill the reservoir every Sunday morning with my coffee and that’s literally all I have to do.
Brands like Lechuza, Santino, and GreenBasic make decent ones. You can also find perfectly good budget options on Amazon for around $15-25. Look for one with a water level indicator so you can see at a glance when it needs a refill.
Quick tip: Don’t use self-watering pots for succulents or cacti. Those plants hate sitting near moisture and will rot.
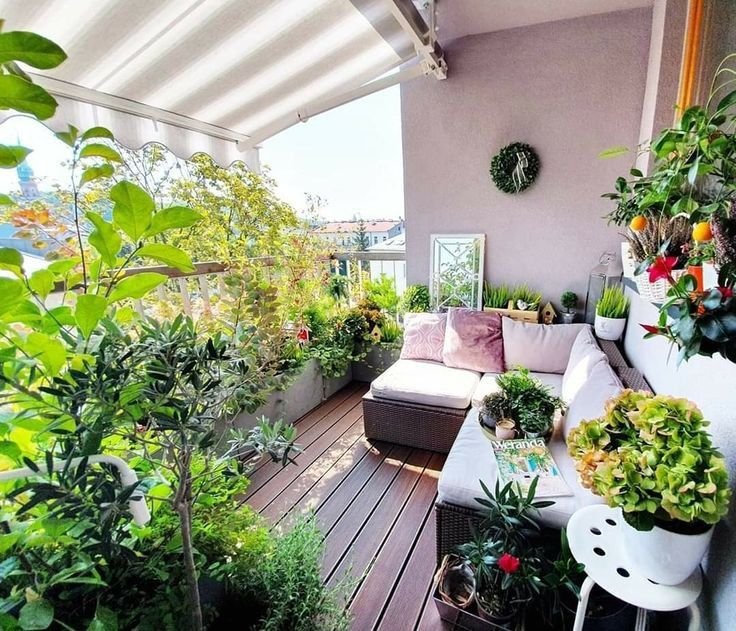
3. Group Your Plants Together (Seriously, Just Move Them Closer)
This trick sounds almost too simple to be real, but it works.
When you cluster plants together, they create a mini humid microclimate around themselves. The leaves release moisture through transpiration, and that moisture hangs around the other plants nearby. The result? The soil doesn’t dry out as fast, which means you water less frequently.
It also makes watering faster — instead of hunting around your apartment for scattered pots, everything is in one spot. Pour, done.
I reorganized my balcony to group all my vegetables together and all my herbs together. I’m genuinely watering about 30% less often than I was when everything was spread out, and the plants are actually healthier.
Bonus: grouped plants also look better aesthetically. A cluster of lush greenery always looks more intentional than random pots scattered around.
If you want more inspiration on arranging your space, check out these 8 Smart Apartment Garden Guide Layout Ideas for Small Balconies — there are some really clever grouping setups in there.
4. Drip Irrigation Systems: Set It and Actually Forget It
Okay, hear me out — I know “drip irrigation” sounds like something for a professional greenhouse, not a 6×8 foot balcony. But there are small, affordable drip systems designed specifically for apartment gardens, and they’re surprisingly easy to set up.
Here’s how a basic setup works:
- You connect a main hose to your tap (or a water reservoir/bucket)
- Small drip lines branch off to each individual pot
- A timer controls when the water flows and for how long
The whole setup for a small balcony might cost you $25-50 and takes maybe an hour to put together.
I use a kit from Raindrip for my balcony tomatoes and it’s been incredible. I set it to water for 10 minutes every morning at 7am and I honestly forget I even have it running most days.
What to look for in a timer:
- Programmable daily or multiple-times-daily cycles
- Battery-operated (so you don’t need an outlet nearby)
- A manual override option for when you want to water on demand
The Orbit B-hyve and Rain Bird timers are popular choices. The Orbit one even has a smartphone app so you can adjust the schedule remotely — very useful if you’re traveling and paranoid about your plants (just me?).
One thing to watch: drip systems work best for outdoor balcony setups. For indoor plants, they can get messy and aren’t really necessary.
5. Mulching Your Pots Is Underrated
Most people associate mulching with outdoor garden beds, but it works just as well in containers, and it can significantly reduce how often you need to water.
Mulch is basically any material you put on top of the soil to slow down evaporation. In pots, you can use:
- Coco coir (my personal favorite — light, natural, effective)
- Wood chip mulch (looks nice, works well)
- Pebbles or gravel (great for succulents, adds a clean aesthetic)
- Straw (works but looks a bit rustic for balconies)
Just add about a half-inch to an inch of mulch on top of your soil after watering. It acts like a little blanket, keeping the moisture in the soil instead of letting it evaporate into the air.
In hot weather (like a Karachi summer — brutal), this can literally double the time between waterings. I tested this properly: same plant type, same pot size, one with coco coir mulch and one without. The mulched pot stayed moist for nearly twice as long.
6. Bottom Watering: The Method I Wish I Knew From Day One
Top watering is what most people do — you pour water on the soil from above. It works, but it’s inefficient. A lot of water runs off the surface before it even soaks in, especially if the soil has gotten dry and a bit compacted.
Bottom watering is different. You place your pot in a tray or basin filled with about an inch of water and just let it sit for 20-30 minutes. The soil absorbs water from below, drawing it up through the drainage holes. The plant gets a deep, thorough drink, and the roots are encouraged to grow downward (which makes for healthier plants overall).
Why it’s great for busy people:
- You set it and walk away — no standing over the plant carefully pouring water
- The plant only takes what it needs, so you almost can’t overwater
- Works incredibly well for herbs, vegetables, and most houseplants
After 20-30 minutes, remove the pot from the water and let any excess drain. Don’t leave it sitting in water permanently — that does cause root rot.
I do bottom watering for all my indoor herbs on Sunday mornings. Takes about two minutes of actual effort. The rest of the time I’m just letting them soak while I make breakfast.
This one technique alone helped me grow some really impressive herbs. If you want to see which ones do particularly well with this method, there’s a great breakdown in this 7 Powerful Apartment Garden Guide Herbs You Can Grow Indoors article.

7. Use a Moisture Meter — Stop Guessing Completely
If you want to get a bit more precise (and also feel like a plant scientist, which is honestly fun), a soil moisture meter is worth every penny.
It’s a small probe you stick into the soil that gives you an instant reading of how moist or dry the soil is — usually on a scale of 1 to 10. No more guessing, no more finger tests, no more coming home to droopy plants and panicking.
They cost anywhere from $8 to $20 on Amazon, and you don’t even need batteries for most of them — they work on a galvanic cell system that draws power from the soil itself.
How I use mine:
- I do a quick check of all my pots every other day — takes 3 minutes max
- If a reading is below 3, it’s time to water
- If it’s 4-6, I check again tomorrow
- Above 7, definitely leave it alone
| Moisture Level | What It Means | Action |
|---|---|---|
| 1–3 | Very dry / Dry | Water now |
| 4–5 | Moist | Check tomorrow |
| 6–7 | Very Moist | Leave it alone |
| 8–10 | Wet | Definitely skip watering |
The XLUX T10 is a popular budget option. The Gouevn is slightly pricier but has good reviews for accuracy. Either one will do the job for apartment plants.
One caveat: moisture meters aren’t as reliable for cacti and succulents because the soil type throws off the reading. For those, just use the deep finger test.
The Mistake I See Beginners Make All the Time
Using pots without proper drainage holes.
I know decorative pots without holes look really nice. But if water can’t escape, it just sits at the bottom and slowly rots the roots. This is probably the number one reason apartment plants die.
If you fall in love with a pot that has no drainage, use it as a decorative outer cover and put the plant in a plain nursery pot inside it. Best of both worlds — looks great, drains properly.
Also, don’t use saucers that trap large amounts of standing water directly under your pot for days. A little water in the saucer after watering is fine, but dump it out after about 30 minutes.
Making It All Work Together
Here’s a simple system that works for me as someone who genuinely doesn’t have time to hover over their plants:
Morning (2 minutes): Quick moisture meter check of all pots. Water anything that needs it using bottom watering or a watering can.
Sunday (5-10 minutes): Refill self-watering pot reservoirs. Check drip timer is working correctly. Do a general look-over of the plants.
Occasional: Adjust the drip timer seasonally (more frequent in summer, less in cooler months).
That’s genuinely it. You don’t need to make apartment gardening a second job. The tricks above are specifically designed to reduce the daily effort while keeping your plants happy and alive.
If you’re just getting started and want to nail the basics before diving into the watering systems, this 10 Ultimate Apartment Garden Guide Starter Tips for Success is a solid foundation to build from.
Apartment gardening and a busy schedule can absolutely coexist — it just takes the right systems. Once you stop white-knuckling it and start letting smart tools and techniques do the heavy lifting, you’ll actually enjoy your garden instead of feeling guilty about it every time you walk past a wilting plant.
Trust me, your basil will thank you.
Want to take your apartment garden even further? Don’t miss: 9 Smart Apartment Garden Guide Tricks for Tiny Balconies