Meta Description: Apartment garden guide upgrades that actually work — 12 instant, low-cost green space makeover ideas to transform your tiny apartment into a thriving garden paradise.
Guide to Easy Apartment Garden Upgrade: 12 Instant Green Space Makeover Ideas
Simple Ways to Upgrade Your Apartment Garden and Get Results in Minutes
To many people, growing a garden in an apartment seems insane. No yard. No soil. Maybe only a little balcony or one sunny window.
But the reality is, apartment gardening — while it may seem challenging at first — isn’t just possible, it’s one of the most rewarding hobbies you can embark on. You just need the right upgrades to make it work.
This guide breaks down 12 simple, low-cost, and highly effective upgrades for your apartment garden. Each one delivers results fast. Whether you’re a total newbie or someone who already has a few plants on your windowsill, these tips will supercharge your space.
Let’s get into it.
1. Convert to Self-Watering Planters and See Everything Transform
Inconsistent watering is one of the biggest reasons apartment plants die. Life gets busy. You forget. You overwater. The plant suffers.
Self-watering planters eliminate this issue completely.
These pots have a reservoir at the bottom for water. The plant draws moisture upward through the soil when it requires it. This keeps the roots content without flooding them.
Why This Upgrade Is So Fast
You’ll feel the difference in a matter of days. Plants stop wilting. Leaves look fuller. Growth picks up.
Self-watering planters come in all sizes — from small enough to hold a pot of herbs, to large enough for containers that sit on a balcony. Brands like Lechuza and IKEA’s SENAPSKÅL line are available at affordable prices that also look good.
Best plants for self-watering planters:
- Basil
- Pothos
- Peace lily
- Tomatoes
- Lettuce
This is the one upgrade that every apartment garden guide recommends starting with, and for good reason. It eliminates the single most common point of failure.
2. Add a Grow Light — Even One Small Bulb Makes a Difference
Apartments often don’t have enough natural light. North-facing rooms, blocked windows, or city buildings that cast shadows — these are all serious problems for indoor plants.
A grow light changes everything.
You aren’t required to have an expensive setup. An LED grow bulb can screw into a desk lamp and keep herbs or leafy greens going strong all year.
How to Choose the Right Light for Your Space
| Light Type | Best For | Cost Range |
|---|---|---|
| Full-spectrum LED | All plants | $15–$60 |
| Red/blue LED strip | Flowering, fruiting | $20–$80 |
| Fluorescent tube | Seedlings, herbs | $10–$40 |
| Smart grow panel | Large setups | $60–$200 |
Most vegetables and herbs do best with between 4000K and 6500K color temperature. For best results, hang lights 6–12 inches above your plants.
Use a timer for 12–16 hours of light per day. Plants will respond vigorously — sometimes within a week you’ll see new growth pushing out.
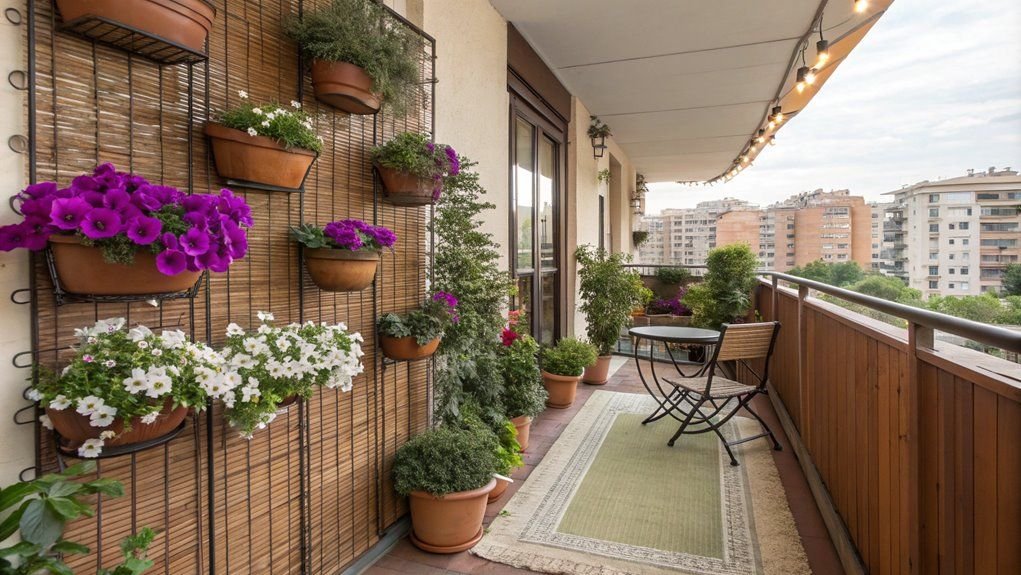
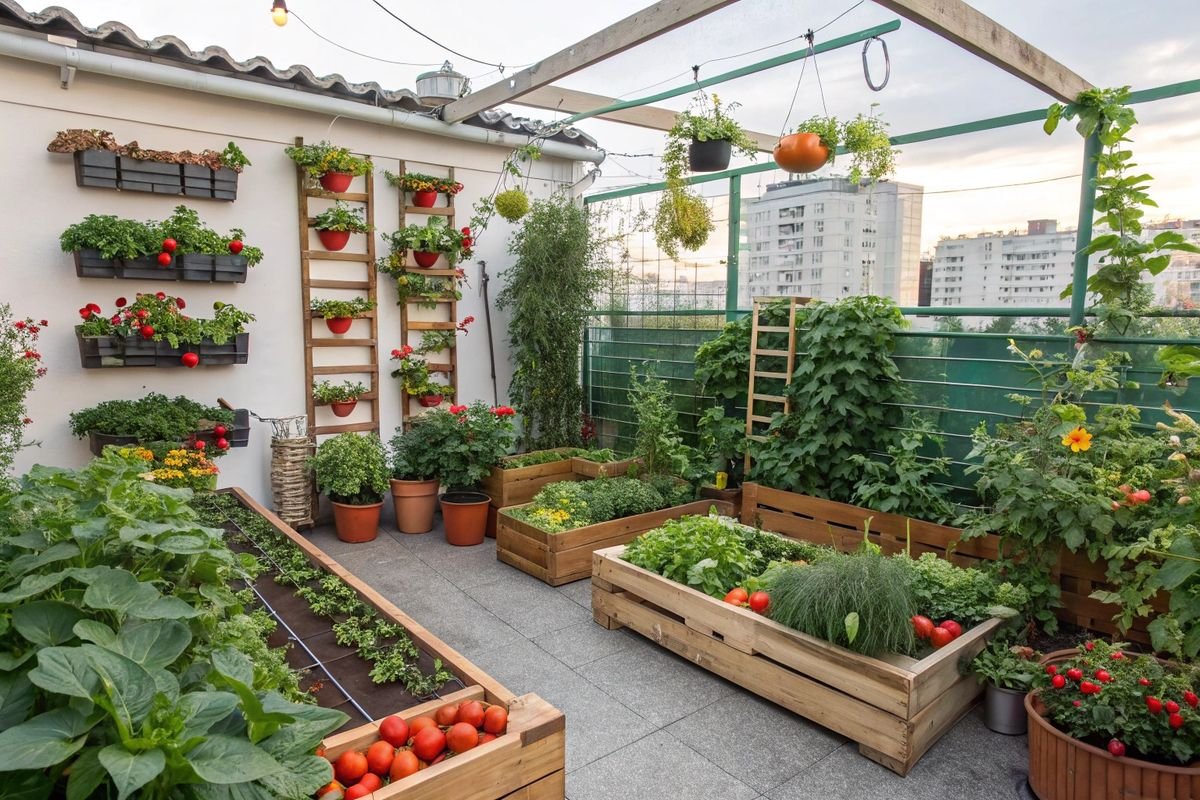
3. Plant Vertically With a Wall-Mounted Planter
Apartment floor space is scarce. But your walls? Those are completely free real estate.
Vertical gardening is one of the smartest strategies in any apartment garden guide. It allows you to grow more plants without any additional floor space.
Easy Ways to Go Vertical Starting Today
- Pocket planters — Fabric or felt hanging organizers are ideal for herbs and smaller flowers. Suspend them from a sunny wall or balcony railing.
- Pegboard with pots — Mount a pegboard on a wall and hang small planters from it using hooks. Simple to move around and easy to personalize.
- Floating shelves — Layer three or four shelves in a sun-drenched corner and put different plants on each level.
- Ladder shelves — Lean a wooden ladder shelf against a wall and you’ll have 4–5 levels of planting instantly.
Vertical systems can accommodate 10 to 20 plants in the space taken by one big pot. It’s a huge upgrade for a small space.
4. Upgrade Your Soil — Bagged Soil Is Often the Culprit
Many people just grab the cheapest potting mix they can find at the hardware store. This is a mistake that silently sets plants up to fail.
Generic potting soil often compacts, has poor drainage, and does not contain the nutrients that plants need to grow properly.
The Right Mix for Apartment Containers
There are three things that make a great container mix:
- Base potting mix — Light and fluffy, no garden soil
- Perlite — Small white volcanic stones that help with drainage (around 30%)
- Worm castings — Slow-release natural fertilizer for feeding plants
Combine these and your plants will receive a foundation that genuinely fosters healthy roots.
For succulents and cacti, use a cactus base mix instead of the standard blend and add even more sand or grit.
It takes less than $20 to make this upgrade, but it makes a significant difference in the pace of plant growth.
5. Start a Windowsill Herb Garden This Weekend
There’s nothing like the thrill of snipping fresh herbs from your own kitchen garden. And herbs are the ideal starting plant for any apartment gardener.
They’re small. They grow fast. They’re useful. Plus, they look lovely on a windowsill.
The Best Herbs to Grow on Windowsills
| Herb | Light Needed | Days to First Harvest | Difficulty |
|---|---|---|---|
| Basil | Full sun | 30–60 days | Easy |
| Mint | Partial shade | 30 days | Very Easy |
| Chives | Moderate light | 30 days | Easy |
| Parsley | Moderate light | 60–90 days | Easy |
| Rosemary | Full sun | 60+ days | Moderate |
| Cilantro | Moderate light | 21–28 days | Easy |
Plant three or four herbs in separate containers. Store them in the sunniest window you can find. Water when the top inch of soil feels dry.
In a month, you’ll be seasoning every meal with fresh flavor. That’s an immediate impact that keeps paying off.
6. Create a Simple Drip Watering System for Your Balcony
If your balcony has lots of pots, hand-watering every day can get tiring quickly. A simple drip system handles this automatically.
These setups are not complicated. Basic kits priced at $20–$50 hook up to a standard outdoor tap. Thin tubes extend from the main line to each pot.
How to Set One Up in an Afternoon
- Buy a simple drip kit (Raindrip and Orbit both make fantastic starter kits)
- Attach the main line to your external tap
- Thread the tubing through your balcony railing
- Add individual drip emitters to each pot
- Set a timer to water in the early morning
Once set up, your balcony garden waters itself every day. Plants stay consistently hydrated. You stop worrying when you travel or get busy.
This is one of those upgrades that feels like magic from the moment you turn it on.
7. Use Slow-Release Fertilizer in Every Container
Plants grown in containers deplete nutrients quickly. Unlike plants in the ground, they can’t spread their roots to find new food sources. Whatever is in the pot is all they’re going to get.
Slow-release fertilizer pellets fix this.
One application lasts 3–6 months, slowly feeding your plants with every watering. No mixing, no measuring, no guessing.
Best Fertilizers for Apartment Gardens
- Osmocote Smart-Release — The gold standard. Covers the majority of plant types.
- Espoma Organic — Great for edibles like herbs and vegetables. Completely safe for food crops.
- Jobe’s Organics Spikes — Push spikes into the soil and walk away. Super beginner-friendly.
Add fertilizer at the beginning of the growing season, then step back and let the nutrients do their work.
You can expect thicker stems, darker green leaves, and noticeably faster growth within 2–3 weeks.
8. Repot Anything That Looks Stuck or Struggling
Here’s a little secret that most beginner gardeners don’t figure out: a pot that is too small is one of the biggest reasons for slow or stunted plant growth.
When roots fill the entire container, they have nowhere left to go. The plant stops growing. Sometimes it starts to decline.
How to Tell If a Plant Needs More Space
- Roots poking out of the drainage holes at the bottom
- Soil dries out very quickly after watering
- Roots looping around themselves when you tip the plant out
- Zero growth for months on end
Pot up the plant into a container 2 inches bigger in diameter. Fill in the sides and bottom with fresh potting mix.
Most plants recover quickly after repotting. New growth usually appears within 2–4 weeks as roots reach into the new soil.
This is a low-cost upgrade that might rescue plants you thought were beyond help.
9. Set Up a Compact Raised Bed on Your Balcony
Raised beds aren’t just for backyards. For apartment gardeners, there are compact fabric or wooden raised beds made specifically for balconies.
These give you genuine growing depth — 8 to 12 inches — which is sufficient for vegetables that might not otherwise thrive in standard pots.
What You Can Grow in a Balcony Raised Bed
- Cherry tomatoes
- Bush beans
- Kale and spinach
- Radishes and carrots
- Peppers
- Strawberries
A 2-by-4-foot raised bed fits on nearly any balcony. Fill it with a good vegetable mix and add a slow-release fertilizer.
According to the RHS (Royal Horticultural Society), growing vegetables in containers and raised beds is one of the most practical ways for urban gardeners to produce fresh food at home.
The results are impressive. A single balcony raised bed can yield pounds of fresh vegetables over the growing season. That’s a major win compared to a few pots of herbs.
10. Use Reflective Surfaces to Multiply Your Light
This is one of the smartest and cheapest upgrades in any apartment garden guide.
If your space gets limited light, you can reflect and redirect it. A mirror, a white wall, or even reflective emergency blankets hung behind your plants can dramatically increase the light that reaches them.
Simple and Nearly Free Reflective Fixes
- White-painted wall — Paint the wall behind your plant shelf white or bright cream. This reflects light back toward the plants instead of absorbing it.
- Dollar store mirrors — Small mirrors placed on a windowsill or shelf beside plants bounce sunlight directly onto the leaves.
- Mylar film — A few dollars buys a roll of reflective Mylar that can be cut and placed behind plants on a shelf or in a grow tent.
- Light-colored pots — Dark pots absorb heat. White or light-colored pots reflect light and help keep roots cooler in summer.
None of these are expensive, but together they can increase your plants’ light absorption by 20 to 40 percent. That’s a significant shift for plants in a dark apartment.
11. Set Up a Plant Corner With a Humidity Tray
Most houseplants — especially tropicals — struggle in the dry air of most apartments. Both heating and air conditioning remove a lot of humidity.
A humidity tray is a simple and effective solution.
How to Create One in Five Minutes
- Take a shallow tray or plate larger than your pot’s base
- Add a layer of pebbles, gravel, or LECA balls
- Fill with water just below the level of the pebbles
- Set your plant on top
Water evaporating from the surface creates a humid zone around the plant. This recreates the tropical conditions many favorite plants need.
Plants that love humidity trays:
- Ferns
- Orchids
- Peace lilies
- Calatheas
- Monsteras
- Air plants
Place multiple humidity-loving plants together in one tray. Plants release moisture through their leaves, so grouping them creates a mini humid microclimate. It’s a small trick with a big impact.

12. Create a Composting System — Even in a Small Apartment
Apartment composting seems messy and complex. It doesn’t have to be either.
Worm composting (also known as vermicomposting) is clean, compact, and odorless when done correctly. A small worm bin can fit underneath your kitchen sink or in a closet.
Worm Composting in Apartments — How to Get Started
What you need:
- A covered plastic tub (10–20 gallon)
- Red wiggler worms (available online or at garden centers)
- Bedding (shredded newspaper or cardboard)
- Kitchen scraps
What worms eat:
- Vegetable peels
- Fruit scraps
- Coffee grounds
- Tea bags
- Crushed eggshells
After 2–3 months, your worms will have produced rich dark compost known as worm castings. This is the absolute best plant food you can use. Sprinkle a handful into each pot or use it as a top dressing.
This completes the cycle — your kitchen waste becomes food for your garden. It costs next to nothing after setup and creates results that commercially produced fertilizers can’t compete with.
Upgrade Overview — All 12 Upgrades at a Glance
| Upgrade | Difficulty | Approximate Cost | Speed of Results |
|---|---|---|---|
| Self-watering planters | Easy | $10–$50 | 1–3 days |
| Grow light | Easy | $15–$60 | 1–2 weeks |
| Vertical planter system | Easy | $15–$80 | Immediate |
| Better soil mix | Easy | $10–$25 | 2–4 weeks |
| Windowsill herb garden | Easy | $10–$30 | 3–4 weeks |
| Drip irrigation | Moderate | $20–$50 | Immediate |
| Slow-release fertilizer | Easy | $10–$20 | 2–3 weeks |
| Repotting | Easy | $5–$20 | 2–4 weeks |
| Balcony raised bed | Moderate | $30–$80 | 4–8 weeks |
| Reflective surfaces | Easy | $0–$15 | 1–2 weeks |
| Humidity tray | Easy | $5–$15 | Immediate |
| Worm composting | Moderate | $30–$60 | 2–3 months |
Mixing These Upgrades Delivers the Quickest Results
Each upgrade in this apartment garden guide improves things on its own. But the real magic happens when you stack them.
Start with the quick wins — a grow light, a self-watering planter, and fresh soil. All three together can completely transform a struggling plant setup within 14 days.
Then gradually add the other upgrades. A vertical system expands your collection. A humidity tray helps your tropicals thrive. Once you get the basics down, start a worm bin.
In just one growing season, your apartment can go from a couple of sad houseplants to an indoor garden that gives you fresh food and greenery every single day.
That’s the power of starting. And starting is always the hardest part.
FAQs About Apartment Gardening
Q: What’s the best plant to start with for an apartment garden? Pothos, mint, and basil are the easiest options. They tolerate low light, forgive irregular watering, and grow quickly enough to give you speedy results.
Q: Can I grow vegetables if my apartment doesn’t have a balcony? Yes. Cherry tomatoes, lettuce, spinach, and peppers all do well when grown indoors under a grow light. You don’t need any outdoor space at all.
Q: How much does it cost to start an apartment garden? You could get started with a basic setup — four or so pots, good soil, and one grow light — for $50–$80. Most of the upgrades in this guide cost less than $20.
Q: Do apartment gardens attract bugs? Indoor plants sometimes get fungus gnats or spider mites. Preventing soil from staying too soggy, using well-draining mixes, and wiping leaves periodically helps keep most pests away.
Q: How can I tell if my apartment gets enough light for plants? Hold your palm about 12 inches above a blank white piece of paper near your window. A visible, distinct shadow means the light is good. A faint grey patch means dim light. No shadow at all means you’ll need a grow light.
Q: Is it hygienic to compost in an apartment? A healthy worm bin smells earthy and attracts no pests. The key is balance — don’t overfeed, add bedding regularly, and keep the bin moist but not soaking wet.
Q: How often should I water container plants? Stick your finger an inch into the soil. If it feels dry, give it a thorough soak. If it still feels moist, wait another day. Frequency depends on the specific plant, pot size, and season.
Wrapping It Up — Your Apartment Garden Starts Now
You don’t need a backyard. You don’t need a huge budget. You don’t need to be a master gardener.
All you need is a starting point and the right upgrades from there.
This apartment garden guide gives you exactly that — 12 practical, proven upgrades that work in real apartments with real limitations. Some deliver results in days. Others build into something powerful over weeks and months.
Pick one upgrade from this page and put it in motion today. Then add another next week. By the end of a full season, your space will be transformed — greener, fresher, and alive with the plants you grew yourself.
That’s the power of starting. And now, there’s no reason to wait.