Okay, real talk — I killed three basil plants before I figured out that I wasn’t underwatering them. I was underfertilizing them.
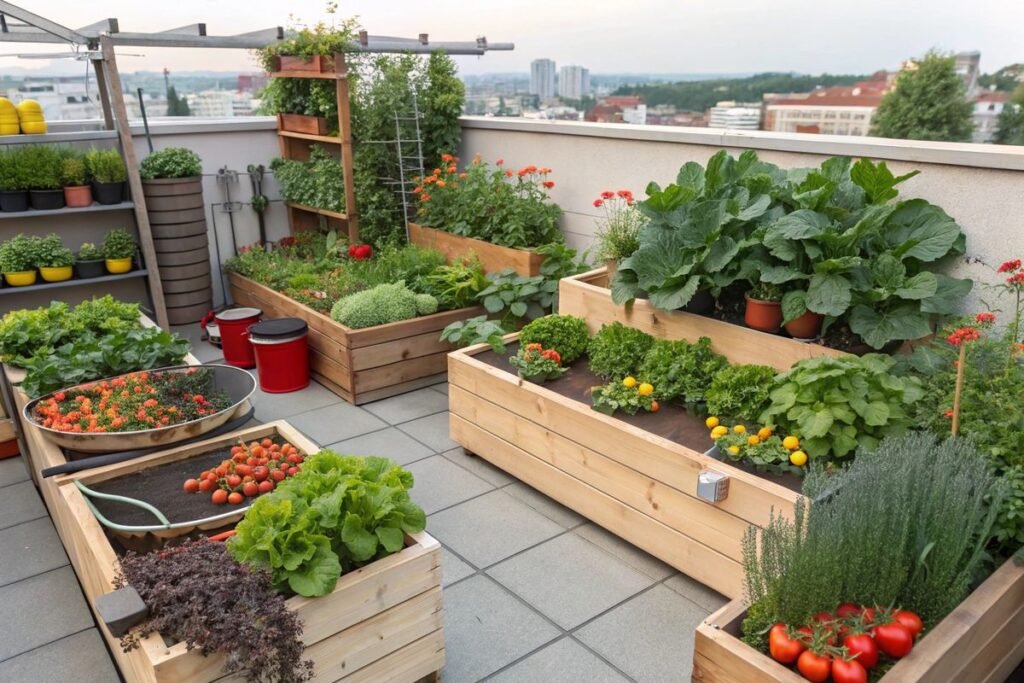
It sounds embarrassing now, but when I first started my apartment garden on a tiny south-facing balcony in a 600-square-foot flat, I genuinely thought sunlight and water were enough. I mean, that’s what plants need, right? Sun, water, done.
Wrong. So wrong.
The moment I started paying attention to fertilizing — actually understanding what my plants were hungry for — everything changed. My tomatoes went from sad, yellowing sticks to actual fruit-bearing plants within weeks. My herbs got bushier. Even my struggling peace lily perked up like it had just had a triple espresso.
So here are the six fertilizer tips that genuinely worked fast for me. Not theory. Not stuff I read off a seed packet. Real things I tested on my own plants, in my own apartment, through a lot of trial and error.
1. Start With a Soil Test — Even a Basic One
This was the tip I ignored the longest, and I regret that. For my first eight months of apartment gardening, I just grabbed whatever potting mix was on sale, dumped it in a pot, and hoped for the best.
Then a neighbor who’s been growing vegetables on her rooftop for years asked me one simple question: “Do you know your soil’s pH?”
I did not.
Turns out, even if you buy the most expensive fertilizer on the market, if your soil pH is off, your plants literally can’t absorb those nutrients. It’s like serving a meal behind a locked door.
I picked up a basic 3-in-1 soil tester from Amazon for under $15 — it measures pH, moisture, and light. Nothing fancy. After testing my pots, I realized my potting mix was sitting around 7.8 pH, which is too alkaline for most herbs and vegetables that prefer 6.0–7.0.
I fixed it by mixing in a little peat moss, which naturally brings pH down. Within two weeks, I could see the difference. New leaves were greener, growth was noticeably faster.
Quick Reference: Ideal pH for Common Apartment Garden Plants
| Plant | Ideal pH Range |
|---|---|
| Basil | 6.0 – 7.0 |
| Tomatoes | 5.8 – 6.8 |
| Lettuce | 6.0 – 7.0 |
| Mint | 6.0 – 7.0 |
| Chili Peppers | 6.0 – 6.8 |
| Peace Lily | 5.8 – 6.5 |
The whole process took about 20 minutes. But it made every fertilizer I applied after that actually work.
2. Liquid Fertilizer Over Granules (At Least to Start)
When I first walked into a garden center, I grabbed a bag of slow-release granule fertilizer because it was cheap and seemed low-effort. Sprinkle and forget, right?
Here’s the thing — for apartment containers, granules can be unpredictable. They release nutrients based on temperature and moisture, and in a small pot that dries out quickly or sits near an air conditioner, that release can be inconsistent.
Liquid fertilizer gave me control. I could see results faster — sometimes within 7–10 days — because the nutrients are already dissolved and immediately available to the roots.
My go-to became a balanced liquid fertilizer with an NPK ratio of 10-10-10 (that’s nitrogen, phosphorus, and potassium in equal parts). I’d dilute it to half the recommended strength and apply it every two weeks.
Why half strength? Because apartment pots have limited soil volume, and over-fertilizing in a container burns roots way faster than in a garden bed. I learned this the hard way when I overdid my chili plant and watched the leaf edges turn brown and crispy within days.
Half strength, twice the patience. That’s the rule I live by now.
If you’re just getting started and figuring out your overall setup, this pairs really well with thinking through your 5 Powerful Apartment Garden Guide Setup Ideas for Small Spaces — because how you position your plants affects how quickly they respond to feeding.
3. The Banana Peel Trick (I Was Skeptical — Then It Worked)
I’ll be honest: when I first saw this on a YouTube video, I thought it was the kind of thing people post for views, not results.
But I was growing tomatoes and my plants were flowering but not setting fruit well. Someone in a gardening Facebook group suggested I might be low on potassium. Potassium helps with fruit development and flower production. Buying a potassium-specific fertilizer felt like overkill for three plants, so I tried the banana peel method.
Here’s what I did:
- Saved banana peels from about a week’s worth of bananas (around 4–5 peels)
- Chopped them into small pieces
- Soaked them in a jar of water for 48 hours
- Used that water (diluted 50/50 with regular water) to water my tomato plants
I did this twice over three weeks.
The results surprised me. My tomato plants went from 2–3 small fruits to a noticeably fuller set within about three weeks. The leaves also looked darker and healthier.
Now, is this scientifically peer-reviewed? Not exactly. But it worked for my plants in my apartment, and it cost me nothing extra. Sometimes the simplest things move the needle.
4. Feed During the Growth Spurt, Not on a Rigid Schedule
For the longest time, I fertilized on a strict every-two-weeks calendar. Tuesday rolls around? Fertilizer day. It felt organized and logical.
But plants don’t grow on your calendar. They have natural growth spurts — usually in spring and early summer when light increases — and slower periods in winter or when stressed.
I started paying attention to actual plant behavior instead. Signs my plants were actively growing and ready for fertilizer:
- New leaves unfurling
- Stems visibly getting taller week over week
- Flower buds starting to appear
Signs they were stressed and not ready for fertilizer (feeding a stressed plant can make things worse):
- Wilting or drooping
- Very dry or waterlogged soil
- Recent repotting (wait at least 3–4 weeks before fertilizing a newly repotted plant)
Once I started fertilizing based on plant signals rather than dates, I stopped wasting fertilizer during slow periods and gave plants what they needed when they could actually use it. Growth felt more consistent and intentional.
This kind of observation-based approach is honestly what separates beginners from people who actually get results. It’s a mindset shift more than a gardening trick.
5. Epsom Salt for Magnesium — The Fastest Fix I’ve Found
This one is genuinely underrated.
About a year into my apartment gardening journey, I noticed my pepper plants had yellowing leaves — but only between the veins. The veins themselves stayed green, but the spaces in between turned yellow-green. It looked patchy and weird.
After some research, I found out this pattern is a classic sign of magnesium deficiency, which is really common in container plants because magnesium leaches out of potting soil quickly with regular watering.
The fix? Plain Epsom salt — the kind you find at any pharmacy for under a dollar. It’s magnesium sulfate.
How I used it:
- Dissolved 1 tablespoon of Epsom salt in 1 gallon of water
- Applied it as a regular watering once a month
- Also did one foliar spray (spraying directly on leaves) for faster absorption
Within about 10 days, the yellowing stopped progressing. New growth came in green and healthy. It was one of the fastest visual improvements I’d seen.
This doesn’t replace balanced fertilizing — Epsom salt only provides magnesium and sulfur, not the full nutrient profile your plants need. But as a targeted fix for that specific deficiency, nothing I tried worked faster.
Nutrient Deficiency Visual Guide:
| Symptom | Likely Deficiency |
|---|---|
| Yellow leaves overall | Nitrogen |
| Yellow between veins, green veins | Magnesium |
| Purple/red leaf undersides | Phosphorus |
| Brown leaf edges | Potassium or over-fertilizing |
| Stunted growth, dark leaves | Phosphorus |
| Pale new growth | Iron |
Keeping this table saved on my phone has genuinely helped me diagnose problems fast instead of guessing and making things worse.
6. Worm Castings: Slow But Genuinely Transformative
This tip doesn’t give you results in a week. But over a month or two? It quietly changes everything about how your plants look and grow.
I started adding worm castings to my potting mix about two years ago after reading that they improve soil structure, add beneficial microbes, and provide a gentle, slow-release nutrient boost. I was skeptical because the NPK numbers on the bag look unimpressive — something like 1-0-0 or similar.
But here’s what I didn’t understand at first: worm castings aren’t just fertilizer. They improve the biology of your soil. They introduce microorganisms that help break down organic matter and make nutrients more bioavailable to plant roots.
I started mixing about 20–25% worm castings into my potting mix for new pots. For existing plants, I’d top-dress about an inch of castings on the soil surface every couple of months.
The results over time: my plants developed more robust root systems (I could tell when repotting — the roots looked dense and healthy rather than sparse), they seemed more resistant to stress, and they recovered faster from problems like underwatering or pest attacks.
If you’re pairing this with smart fertilizing strategies, it also really helps to think through your 9 Proven Apartment Garden Guide Care Tips for Healthy Plants — because fertilizing is just one part of the overall care picture.
Worm castings are also virtually impossible to over-apply, which is a massive relief when you’re nervous about burning your plants. It’s forgiving, and for beginners, that matters.
The Mistakes I’d Tell Every Beginner to Avoid
Since we’re being real here, let me quickly run through the fertilizing mistakes I made so you don’t have to:
Over-fertilizing thinking more = better. It doesn’t. Root burn is real, and it set some of my plants back by weeks.
Fertilizing dry soil. Always water your plants first, then apply liquid fertilizer. Applying fertilizer to dry roots concentrates the salts and damages them.
Using outdoor garden fertilizer in indoor pots. The ratios are different. Indoor/container fertilizers are formulated for the limited soil volume in pots. I used a heavy-duty outdoor granule fertilizer on my balcony herbs once and the salt buildup was visible as a white crust on my soil.
Ignoring the seasons. I fertilized through winter at the same rate as summer and wondered why my plants looked stressed. Most houseplants slow down significantly in winter — they need less fertilizer, not the same amount.
Expecting overnight results. Even “fast-acting” liquid fertilizer takes 7–14 days to show meaningful visual changes. I’d fertilize, panic after 3 days that nothing was happening, and add more. That’s how root burn happens.
How I Track It All Now
I use a simple note in my phone — nothing fancy. For each plant I have:
- Name of the plant
- Last fertilizing date
- What I used
- Any symptoms I noticed
It takes about 2 minutes to update and has saved me from both over-fertilizing and completely forgetting a plant for two months. There are apps like Greg (a plant care app) that can also send reminders if you prefer something more structured.
Consistency combined with observation is the actual secret. The fertilizer tips above are just tools — your attention is what makes them work.
And if you’re still figuring out the bigger picture of balcony and small-space gardening, I’d genuinely recommend checking out 9 Smart Apartment Garden Guide Tricks for Tiny Balconies — there’s a lot of overlap between smart space use and smart plant care.
One Last Thing
Fertilizing isn’t magic, but it’s also not as complicated as gardening YouTube makes it look. Start simple: know your soil, use diluted liquid fertilizer during active growth, watch for deficiency signs, and add organic matter like worm castings over time.
You don’t need 12 products or a complicated feeding schedule. You need attention, consistency, and willingness to adjust.
The plants will tell you what they need. You just have to learn their language.
If you found this helpful, you might also enjoy reading: 10 Powerful Apartment Garden Guide Fertilizing Tricks for Faster Growth — it goes deeper into some of the fertilizing strategies I touched on here, with more specific product recommendations and timing guides.